![[NSX] Installing VMware vCenter Server Appliance on OpenStack](/assets/images/2021-04-09-installing-vcenter-on-openstack/vCenter-corpsite.png)
[NSX] Installing VMware vCenter Server Appliance on OpenStack
- 11 minsWhile working through the installation process of installing VMware NSX-T, I have not yet determined whether it is a standalone product or requires the use of vCenter (vSphere Client). I know NSX-T supports both ESXi and KVM hypervisors, so I will have to clear up this confusion later. However, I no longer have ESX anywhere in my home lab to host a vCenter appliance, so my mission has been to install NSX-T and supporting resources on my existing OpenStack cloud running OpenStack-Ansible (Ussuri).
vCenter ships as an ISO that would ordinarily be installed on a virtual machine running on ESX. Join me while I attempt (and succeed) in deploying vCenter on top of OpenStack.
This post is Part 2 of a series of posts about installing NSX-T and supporting resources onto an OpenStack cloud to be used with a separate OpenStack cloud. If you haven’t read it yet, check out Installing VMware NSX-T Manager on OpenStack, the first post in this series.
Getting Started
This isn’t my first rodeo in shoehorning operating systems onto (cloud) platforms they weren’t meant to run on, and for things that usually run on ESX, that means making a KVM-based environment look a lot like a VMware-based environment. For a VM, that may mean using sata disks instead of virtio disks, or e1000 instead of virtio nics. Not much is different here.
I found a few repos on GitHub where folks have deployed VCSA 6.0 and 6.5/6.7 using KVM, and those were super helpful starting points. For this NSX lab, vCenter 7.0 will be used.
Procuring vCenter
I have an active VMUG membership which allows access to NSX and vCenter, along with ESX and all sorts of other stuff. To start, I downloaded the latest VCSA image, VMware-VCSA-all-7.0.2-17694817.iso, and corresponding license key.
Extracting Files
The following packages are needed to peek inside the VCSA ISO and grab the components we need to make them compatible with OpenStack (KVM):
- bsdtar
- qemu-utils
- virtinst
Install the packages with the following command:
# apt install bsdtar qemu-utils virtinst
Extract the iso to stdout and untar the ova directly into /tmp:
# bsdtar -xvOf VMware-VCSA-all-7.0.2-17694817.iso vcsa/VMware-vCenter-Server-Appliance-7.0.2.00000-17694817_OVF10.ova | tar xv -C /tmp/ -xvf -
The /tmp directory will end up with all sorts of files needed to make the magic happen:
-rw-r--r--  1   64   64     102400 Mar  2 23:01 VMware-vCenter-Server-Appliance-7.0.2.00000-17694817_OVF10.cert
-rw-r--r--  1   64   64  735812096 Mar  2 23:01 VMware-vCenter-Server-Appliance-7.0.2.00000-17694817_OVF10-disk1.vmdk
-rw-r--r--  1   64   64 5571473920 Mar  2 23:02 VMware-vCenter-Server-Appliance-7.0.2.00000-17694817_OVF10-disk2.vmdk
-rw-r--r--  1   64   64      72704 Mar  2 23:02 VMware-vCenter-Server-Appliance-7.0.2.00000-17694817_OVF10-disk3.vmdk
-rw-r--r--  1   64   64      14578 Mar  2 23:01 VMware-vCenter-Server-Appliance-7.0.2.00000-17694817_OVF10-file1.json
-rw-r--r--  1   64   64   89613741 Mar  2 23:01 VMware-vCenter-Server-Appliance-7.0.2.00000-17694817_OVF10-file2.rpm
-rw-r--r--  1   64   64        856 Mar  2 23:01 VMware-vCenter-Server-Appliance-7.0.2.00000-17694817_OVF10.mf
-rw-r--r--  1   64   64     182520 Mar  2 23:01 VMware-vCenter-Server-Appliance-7.0.2.00000-17694817_OVF10.ovf
Convert the disks from vmdk to qcow2:
# qemu-img convert -O qcow2 /tmp/VMware-vCenter-Server-Appliance-7.0.2.00000-17694817_OVF10-disk1.vmdk /tmp/vcenter70-disk1.qcow2
# qemu-img convert -O qcow2 /tmp/VMware-vCenter-Server-Appliance-7.0.2.00000-17694817_OVF10-disk2.vmdk /tmp/vcenter70-disk2.qcow2
# qemu-img convert -O qcow2 /tmp/VMware-vCenter-Server-Appliance-7.0.2.00000-17694817_OVF10-disk3.vmdk /tmp/vcenter70-disk3.qcow2
When attaching multiple disks to an OpenStack instance, the disks will be volumes hosted by Cinder. To create a volume from image, you must know the size of the disk needed. Using the VMware-vCenter-Server-Appliance-7.0.2.00000-17694817_OVF10-file1.json file, I was able to determine the vCPU, RAM, and size of each disk (there are 16) needed to attach to the VCSA appliance:
system          disk1: 48GB
cloudcomponents disk2: 6GB
swap            disk3: 25GB
core            disk4: 25GB
log             disk5: 10GB
db              disk6: 10GB
dblog           disk7: 15GB
seat            disk8: 10GB
netdump         disk9: 1GB
autodeploy      disk10: 10GB
imagebuilder    disk11: 10GB
updatemgr       disk12: 100GB
archive         disk13: 50GB
vtsdb           disk14: 10GB
vtsdblog        disk15: 5GB
disk-lifecycle  disk16: 100GB
The plan, then, was to pre-create a volume for disk2-16, with disk2-3 being based on the vmdk (now qcow2) included with the ISO. The other disks would be blank but sized accordingly.
Upload images
Using the openstack command, upload the qcow2 images:
for i in {1..3}; do
openstack image create --disk-format qcow2 --container-format bare --file /tmp/vcenter70-disk$i.qcow2 vcenter70-disk$i
done
Verify:
root@lab-infra01:/home/jdenton/vcsa# openstack image list | grep vcenter
| b2e45a89-0d77-400e-8a46-8183d8926382 | vcenter70-disk1                   | active |
| 176329d8-cdbe-4724-9202-a6e5f03484c4 | vcenter70-disk2                   | active |
| d2a01904-7ab0-4786-8219-41f3a11465f1 | vcenter70-disk3                   | active |
As mentioned earlier, certain hardware needs to be present for the VCSA appliance to work properly. Notably, a SATA bus and e1000 NIC. The disk1 image is the system, or root, disk for the appliance, so it can be modified with some property adjustments to support the needed hardware:
openstack image set \
 --property hw_disk_bus=sata \
 --property hw_vif_model=e1000 \
 vcenter70-disk1
Create volumes
Using the openstack command, create two volumes for disk2 and disk3:
openstack volume create \
--image vcenter70-disk2 \
--size 6 \
--desc cloudcomponents \
vcenter70-disk2

openstack volume create \
--image vcenter70-disk3 \
--size 26 \
--desc swap \
vcenter70-disk3
The size may have to be adjusted higher to ensure the volume is created successfully.
Verify:
root@lab-infra01:/home/jdenton/vcsa# openstack volume list | grep vcenter
| 2528e324-b293-49b6-ab54-7fbe0c732e2e | vcenter70-disk3     | downloading    |   26 |
| 41380794-e410-4f0f-8ae3-0fd0a110fb9c | vcenter70-disk2     | downloading    |    6 |
Create empty volumes for the remainder:
openstack volume create --size 25 vcenter70-disk4 --desc core
openstack volume create --size 10 vcenter70-disk5 --desc log
openstack volume create --size 10 vcenter70-disk6 --desc db
openstack volume create --size 15 vcenter70-disk7 --desc dblog
openstack volume create --size 10 vcenter70-disk8 --desc seat
openstack volume create --size 1 vcenter70-disk9 --desc netdump
openstack volume create --size 10 vcenter70-disk10 --desc autodeploy
openstack volume create --size 10 vcenter70-disk11 --desc imagebuilder
openstack volume create --size 100 vcenter70-disk12 --desc updatemgr
openstack volume create --size 50 vcenter70-disk13 --desc archive
openstack volume create --size 10 vcenter70-disk14 --desc vtsdb
openstack volume create --size 5 vcenter70-disk15 --desc vtsdblog
openstack volume create --size 100 vcenter70-disk16 --desc disk-lifecycle
After a few minutes, all of the volumes should be listed:
root@lab-infra01:/home/jdenton/vcsa# openstack volume list | grep vcenter
| 5e443e77-f0cb-4ca9-a741-330ea215d4f1 | vcenter70-disk16                        | available      |  100 |
| 145f4c56-5565-41f7-a150-bc81aa50c519 | vcenter70-disk15                        | available      |    5 |
| 03b209ea-ad83-40a5-9cd4-60e4de1395b7 | vcenter70-disk14                        | available      |   10 |
| 467608e0-85b4-44da-92f2-375c8d4d2c25 | vcenter70-disk13                        | available      |   50 |
| 56a03176-ea36-4ad6-861e-565571ce9d12 | vcenter70-disk12                        | available      |  100 |
| 25000084-0c20-4dbd-949a-20065a64c143 | vcenter70-disk11                        | available      |   10 |
| e37ca38d-28c1-41cd-a1ac-fd13d48825dc | vcenter70-disk10                        | available      |   10 |
| cc7cf024-1bfb-4c75-8c9a-51b3f256079b | vcenter70-disk9                         | available      |    1 |
| 10afd11d-0d7a-4797-9b5f-bdb1ff42695f | vcenter70-disk8                         | available      |   10 |
| 07dcf745-510c-48a1-91d4-11aef9f7cc96 | vcenter70-disk7                         | available      |   15 |
| 9f95acd1-0131-4adc-9e93-a71a73ac57c3 | vcenter70-disk6                         | available      |   10 |
| 99ac0727-555a-4047-a1ec-4936ed9f9963 | vcenter70-disk5                         | available      |   10 |
| b27ffa4e-aa41-4481-83b4-d629e6e3dadf | vcenter70-disk4                         | available      |   25 |
| 2528e324-b293-49b6-ab54-7fbe0c732e2e | vcenter70-disk3                         | available      |   26 |
| 41380794-e410-4f0f-8ae3-0fd0a110fb9c | vcenter70-disk2                         | available      |    6 |
Create a flavor
Based on the information presented in the json file, I found there are different sizes of vCenter deployments that support tens or hundreds of nodes. For this environment, a tiny sizing will work well:
- vCPU: 2
- RAM: 12GB
openstack flavor create \
--vcpu 2 \
--ram 12288 \
vcsa-tiny
Do the networking
vCenter has port/traffic requirements that can be found here. The following command(s) create a new security group and rules that can be applied to the VCSA:
openstack security group create vcsa
openstack security group rule create vcsa --protocol icmp
openstack security group rule create vcsa --protocol tcp --dst-port 443
openstack security group rule create vcsa --protocol tcp --dst-port 80
openstack security group rule create vcsa --protocol tcp --dst-port 22
openstack security group rule create vcsa --protocol tcp --dst-port 5480
The appliance needs at least one (1) interface for management. It supports DHCP, so I’ve pre-created a Neutron port with the security group applied:
openstack port create --network LAN --security-group vcsa VCSA1
...
| fixed_ips               | ip_address='192.168.2.190', subnet_id='1d500a35-ff27-4aa2-9201-82159ce1b2f5' |
DNS
My experience with vCenter tells me that functioning forward/reverse DNS is extremely important for a functioning deployment. I have an Unbound DNS service running in my environment, which makes it super simple to implement forward and reverse entries for any FQDN/IP. Here’s a working example for my vCenter host:
Hostname: vcsa1.jimmdenton.com IP: 192.168.2.190
local-data: "vcsa1.jimmdenton.com.  A 192.168.2.190"
local-data-ptr: "192.168.2.190 vcsa1.jimmdenton.com."
Once DNS is in place, it’s time to boot a server.
Boot the appliance
Using the nova command, boot the appliance with the first disk using source=image and bootindex=0. Additional disks should be attached, in order, using the sata bus:
nova boot --flavor vcsa-tiny \
--block-device source=image,id=b2e45a89-0d77-400e-8a46-8183d8926382,dest=volume,size=49,shutdown=preserve,bootindex=0 \
--nic port-id=35aff7fb-2c39-4041-bd52-d24e4a264ad8 \
--block-device source=volume,dest=volume,id=41380794-e410-4f0f-8ae3-0fd0a110fb9c,bus=sata,shutdown=preserve,bootindex=1 \
--block-device source=volume,dest=volume,id=2528e324-b293-49b6-ab54-7fbe0c732e2e,bus=sata,shutdown=preserve,bootindex=2 \
--block-device source=volume,dest=volume,id=b27ffa4e-aa41-4481-83b4-d629e6e3dadf,bus=sata,shutdown=preserve,bootindex=3 \
--block-device source=volume,dest=volume,id=99ac0727-555a-4047-a1ec-4936ed9f9963,bus=sata,shutdown=preserve,bootindex=4 \
--block-device source=volume,dest=volume,id=9f95acd1-0131-4adc-9e93-a71a73ac57c3,bus=sata,shutdown=preserve,bootindex=5 \
--block-device source=volume,dest=volume,id=07dcf745-510c-48a1-91d4-11aef9f7cc96,bus=sata,shutdown=preserve,bootindex=6 \
--block-device source=volume,dest=volume,id=10afd11d-0d7a-4797-9b5f-bdb1ff42695f,bus=sata,shutdown=preserve,bootindex=7 \
--block-device source=volume,dest=volume,id=cc7cf024-1bfb-4c75-8c9a-51b3f256079b,bus=sata,shutdown=preserve,bootindex=8 \
--block-device source=volume,dest=volume,id=e37ca38d-28c1-41cd-a1ac-fd13d48825dc,bus=sata,shutdown=preserve,bootindex=9 \
--block-device source=volume,dest=volume,id=25000084-0c20-4dbd-949a-20065a64c143,bus=sata,shutdown=preserve,bootindex=10 \
--block-device source=volume,dest=volume,id=56a03176-ea36-4ad6-861e-565571ce9d12,bus=sata,shutdown=preserve,bootindex=11 \
--block-device source=volume,dest=volume,id=467608e0-85b4-44da-92f2-375c8d4d2c25,bus=sata,shutdown=preserve,bootindex=12 \
--block-device source=volume,dest=volume,id=03b209ea-ad83-40a5-9cd4-60e4de1395b7,bus=sata,shutdown=preserve,bootindex=13 \
--block-device source=volume,dest=volume,id=145f4c56-5565-41f7-a150-bc81aa50c519,bus=sata,shutdown=preserve,bootindex=14 \
--block-device source=volume,dest=volume,id=5e443e77-f0cb-4ca9-a741-330ea215d4f1,bus=sata,shutdown=preserve,bootindex=15 \
vcsa1
Depending on the speed of your network and storage device, it may be a few minutes before the instance becomes ACTIVE. Once active, check out the console.
root@lab-infra01:/home/jdenton/vcsa# openstack console url show vcsa1
+-------+--------------------------------------------------------------------------------------------+
| Field | Value                                                                                      |
+-------+--------------------------------------------------------------------------------------------+
| type  | novnc                                                                                      |
| url   | https://10.20.0.10:6080/vnc_lite.html?path=%3Ftoken%3Dc3b68bb1-c1b3-4771-ba4a-5d4a49f98a42 |
+-------+--------------------------------------------------------------------------------------------+
The device may go through a series of reboots and/or service restarts before settling on the familiar VMware console dashboard:
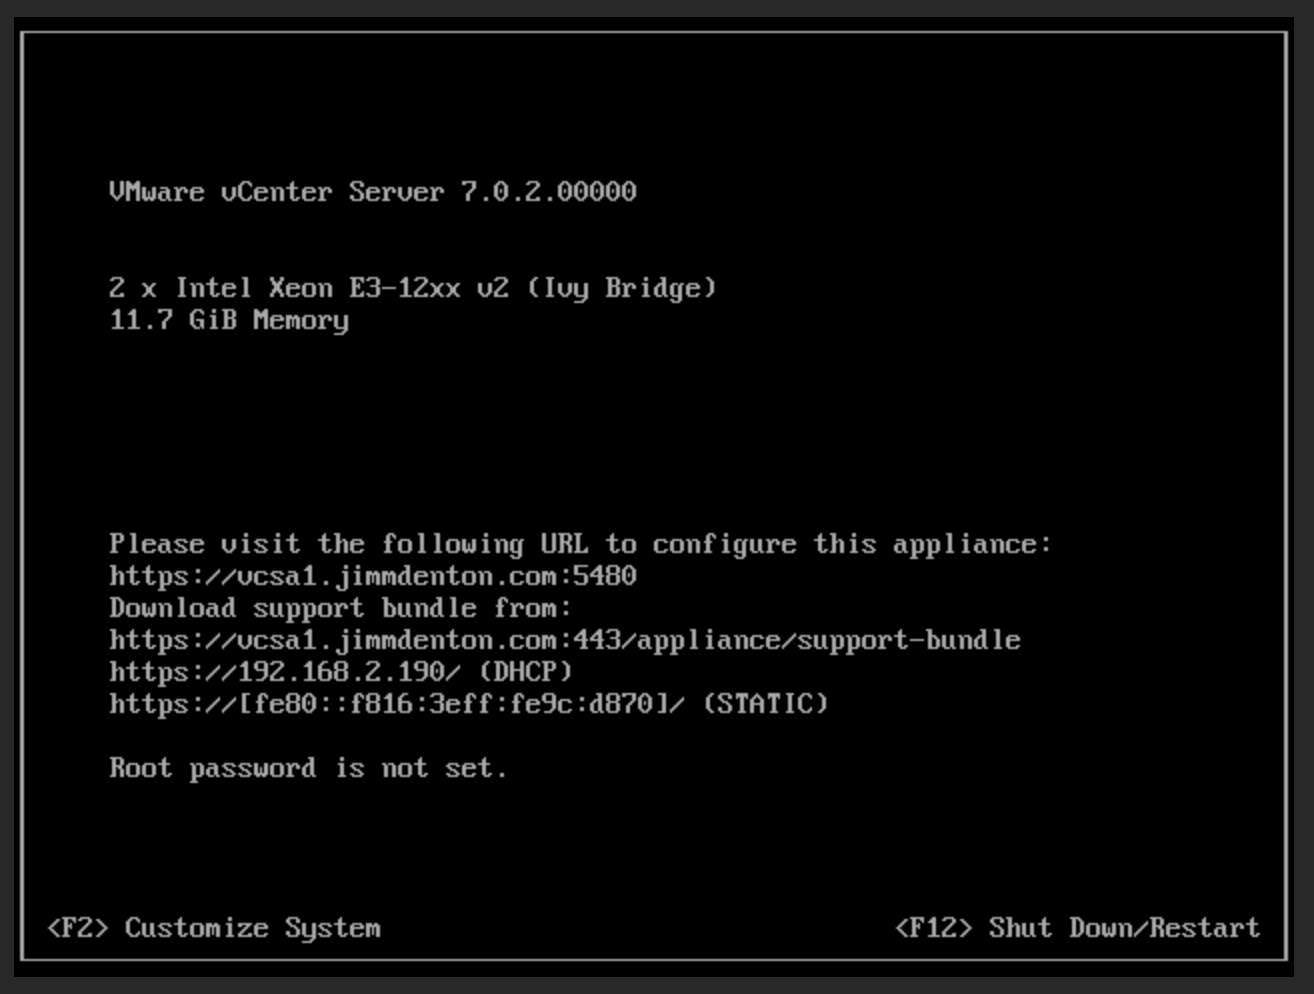
The good news is that DHCP worked and the appliance picked up it’s IP address and other network configurations.
Before you can login, a root password must be set. Hit F2 and change the password. For this exercise, I set the password to 0p3nst@ck$$NSX.
Keep going
At this point, the installation process is really just getting started. The remainder of the process occurs within vCenter Server dashboard in a browser. The dashboard can be reached on port 5480:
https://vcsa1.jimmdenton.com:5480
Login as the root user and newly-minted password:
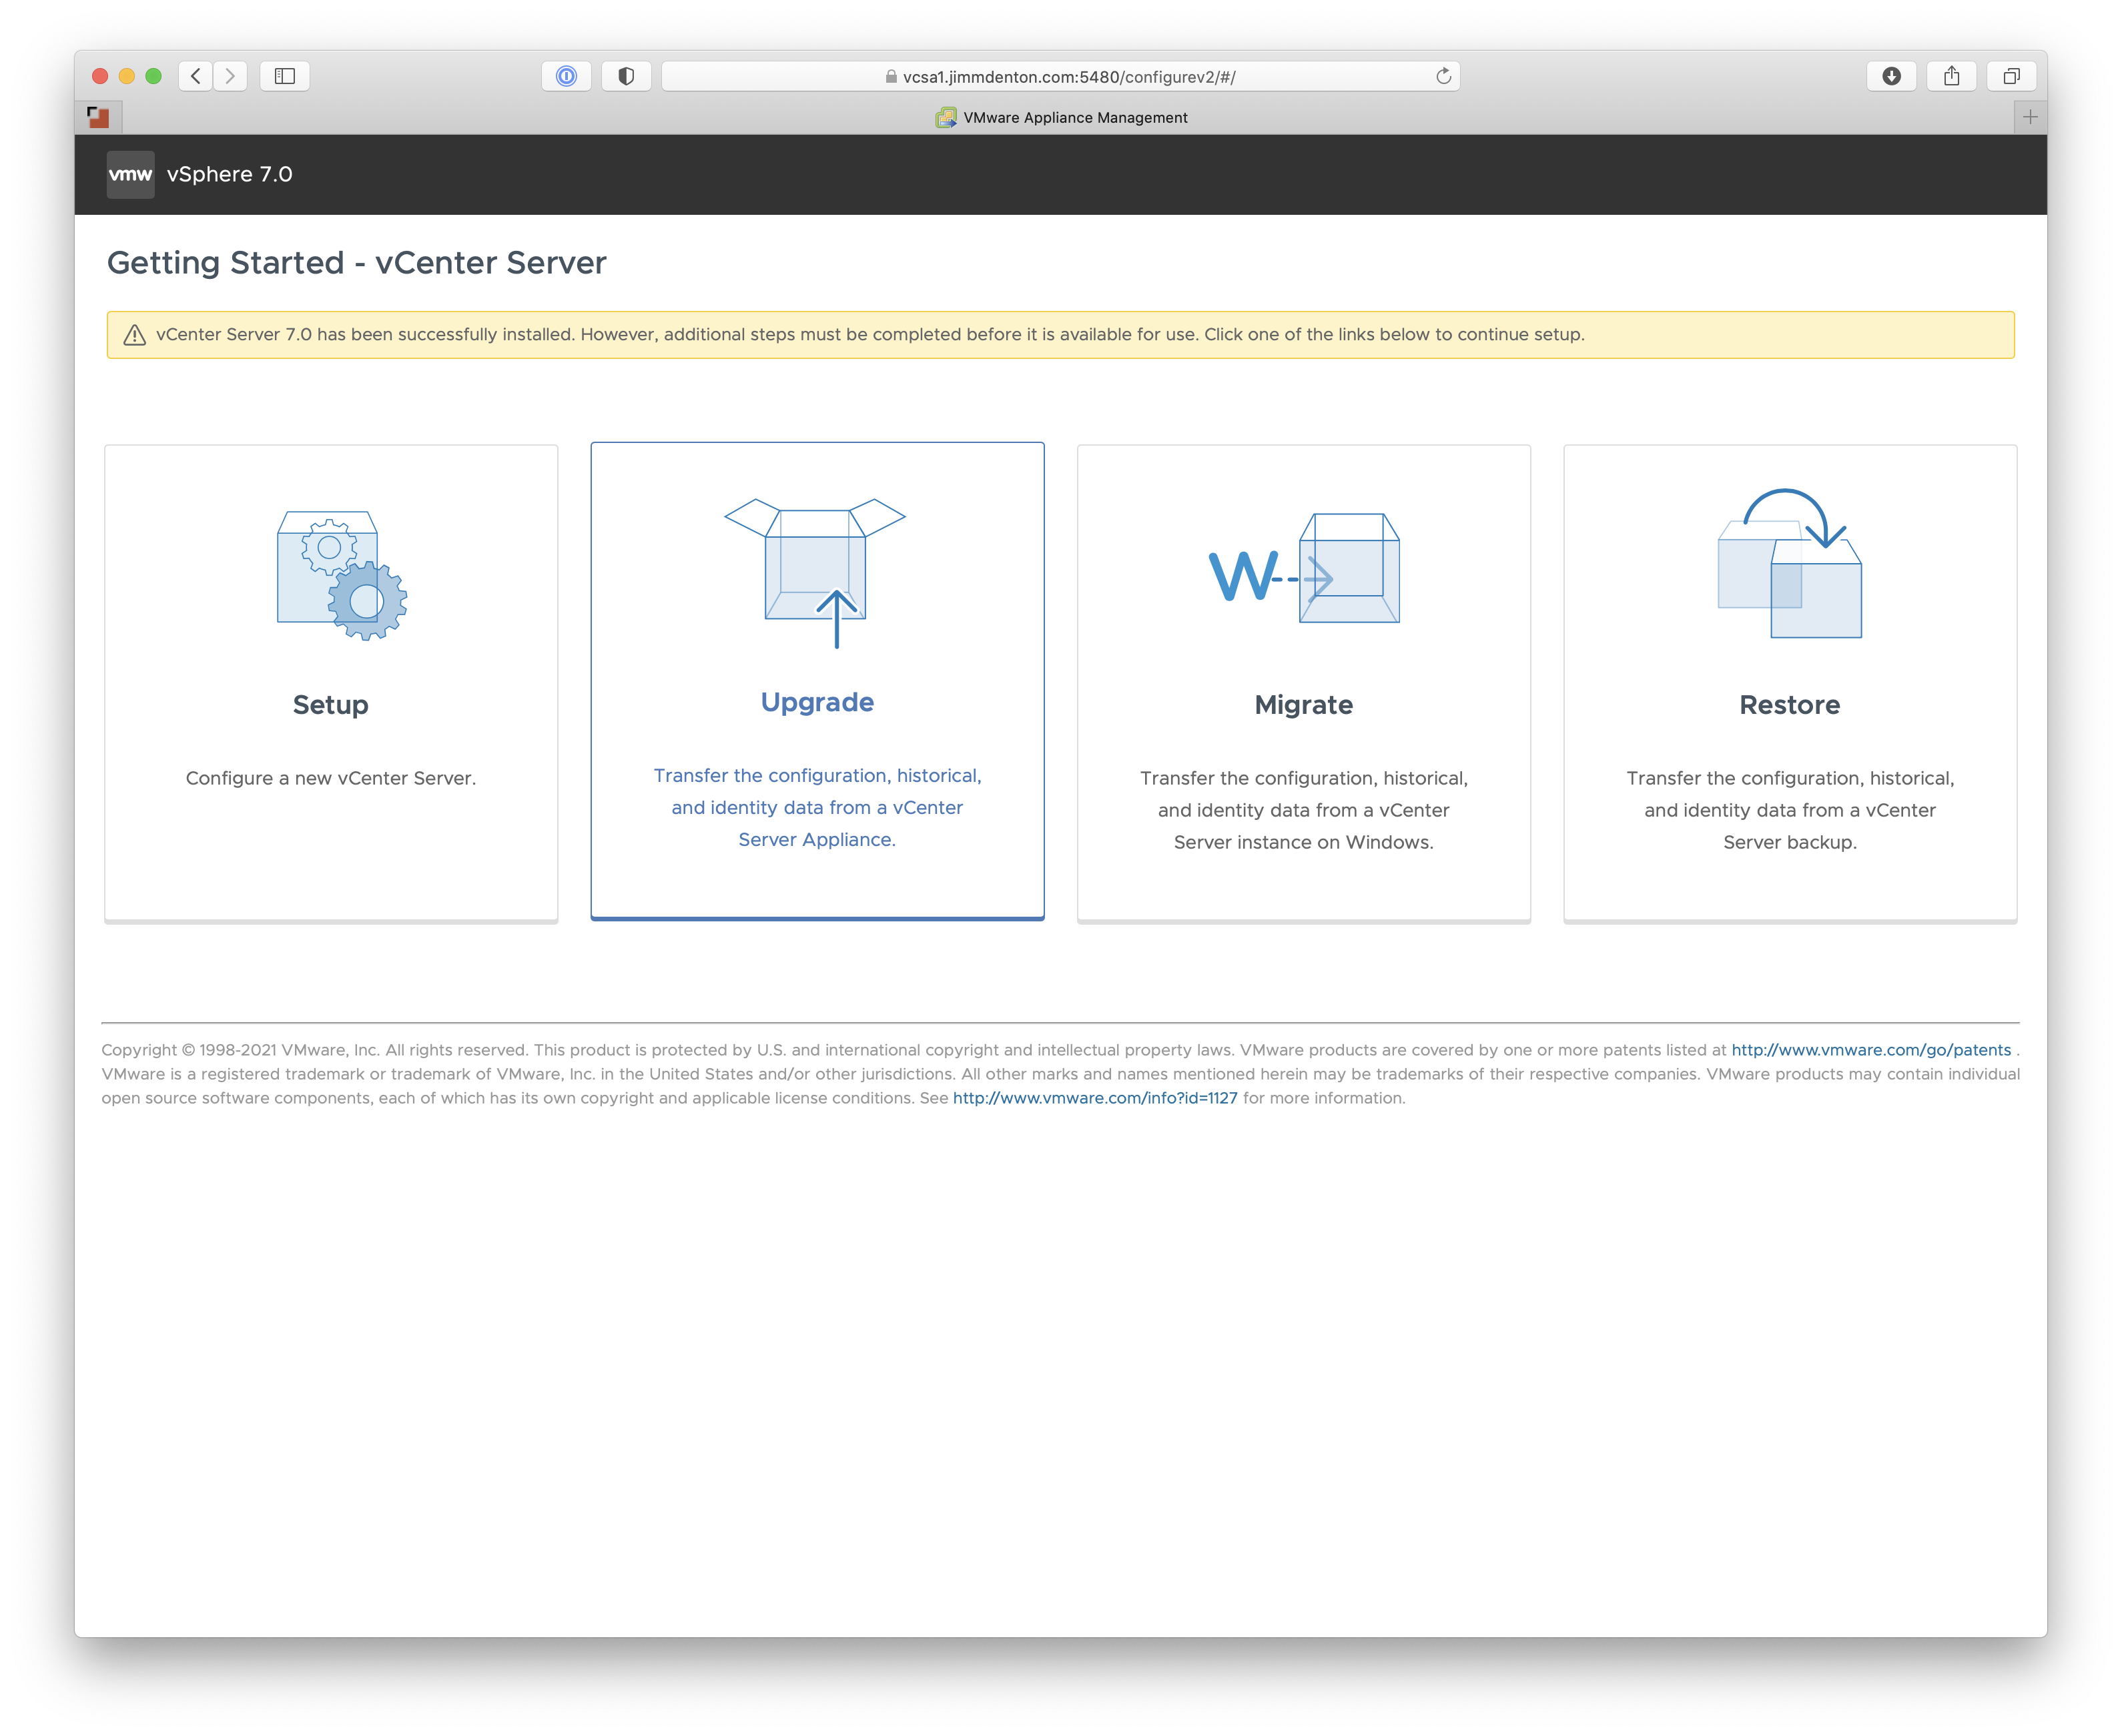
Once logged in, click Setup, then Next to begin Stage 2.
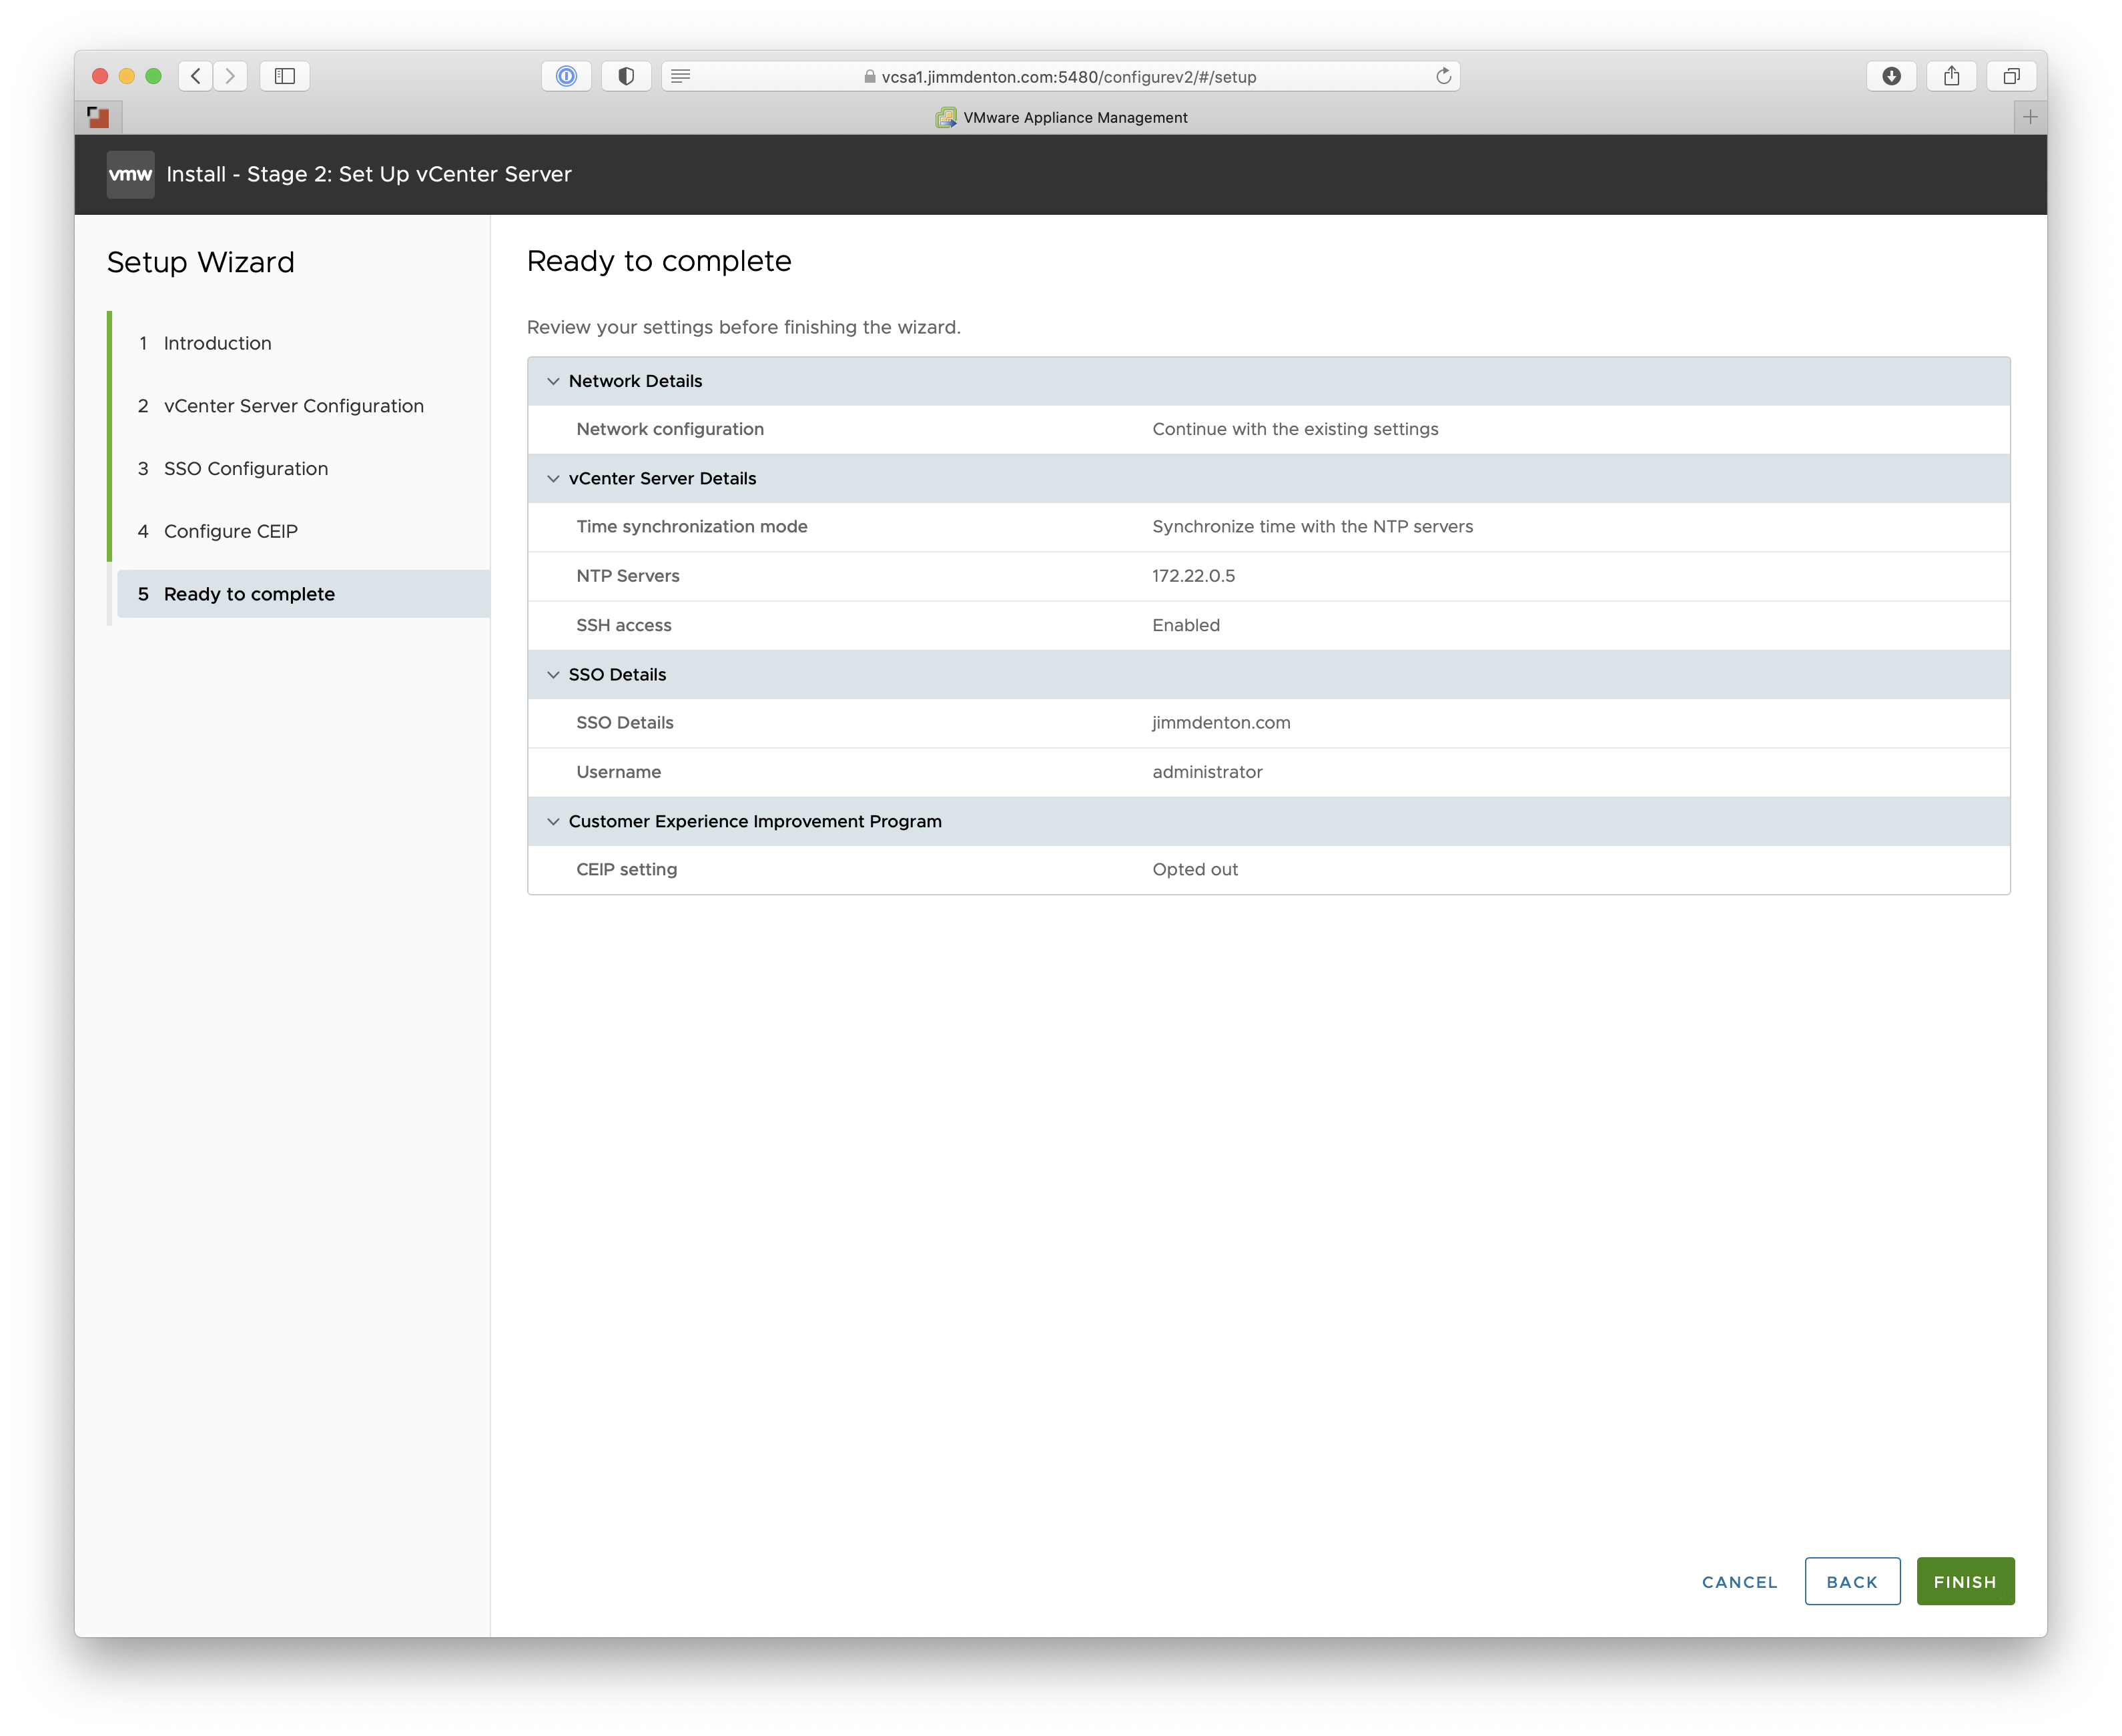
Leave the network configuration alone (rather, leave it set to DHCP), but set the following:
- Time synchronization mode: Synchronize time with NTP Servers
- SSH Access: Enabled
My NTP server is 172.22.0.5, but use what’s right for you. Hit Next.
On the SSO Configuration screen, enter what’s appropriate for your environment. In this environment, I will build a new SSO domain.
- SSO Domain Name:
jimmdenton.com - Username:
administrator - Password:
0p3nst@ck$$NSX

Hit Next.
On the following screen, accept (or not) the CEIP agreement, then hit Next. Once details are confirmed, hit Finish.
Once the installation process has started you will not be able to stop it. The install process may require you to log back in to the GUI after 10-15 minutes as services are (re)started. Login back in as root, then wait some more. For me, the entire process took approximately 20 minutes.
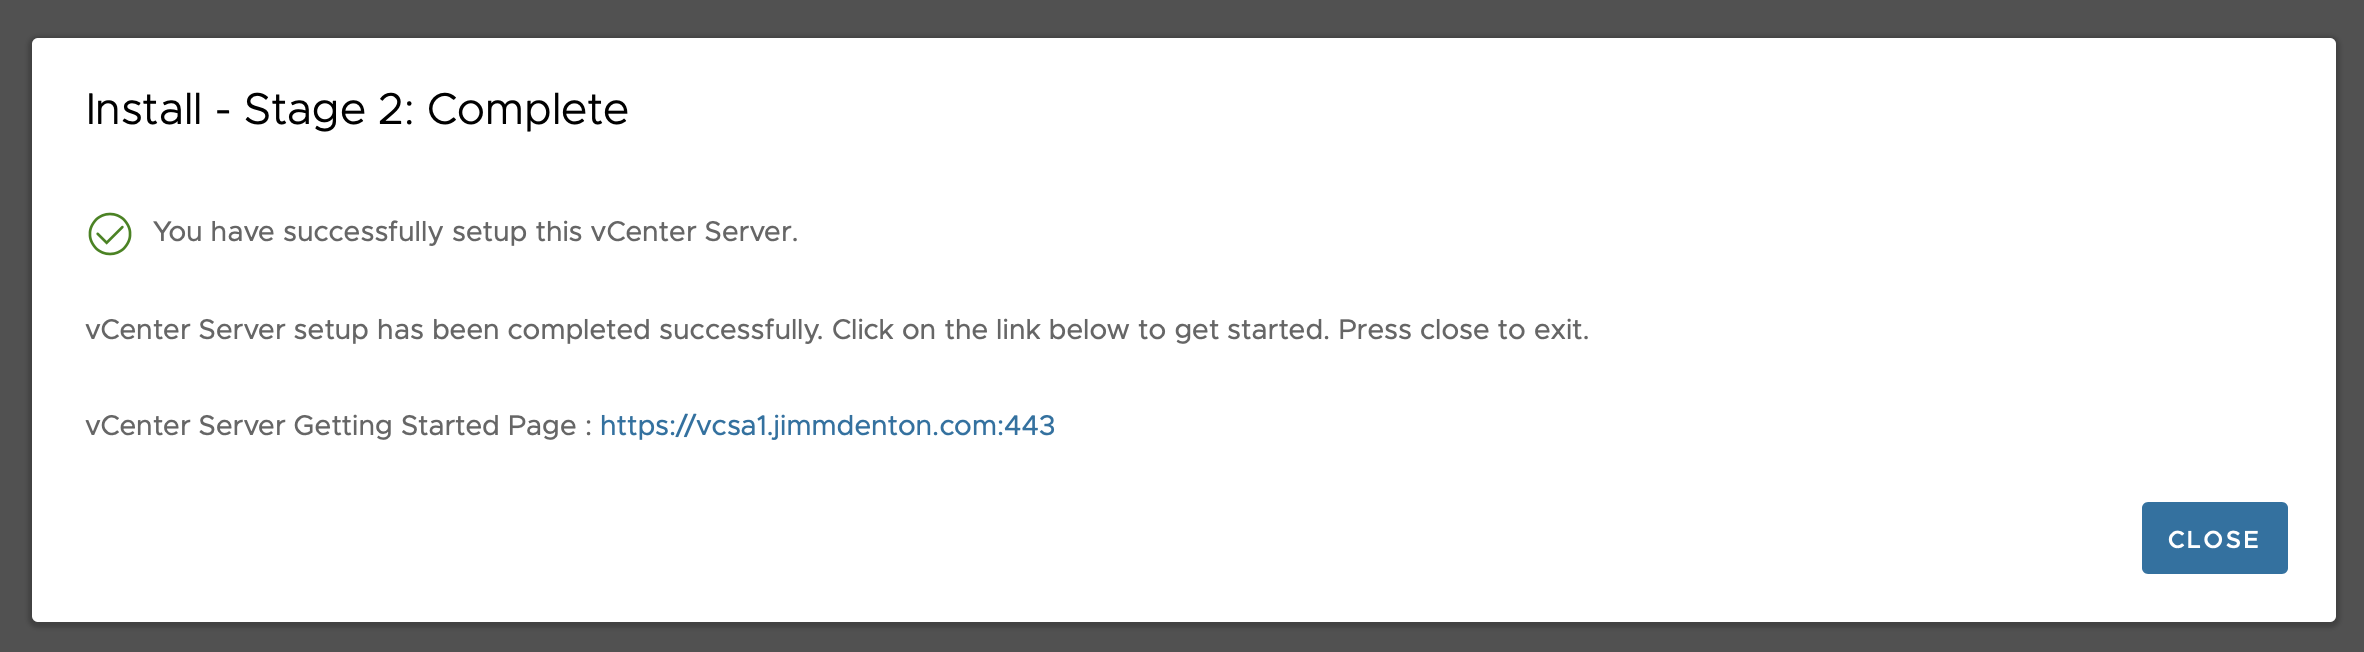
Finally, log back in as root to view the vCenter Server Management dashboard.
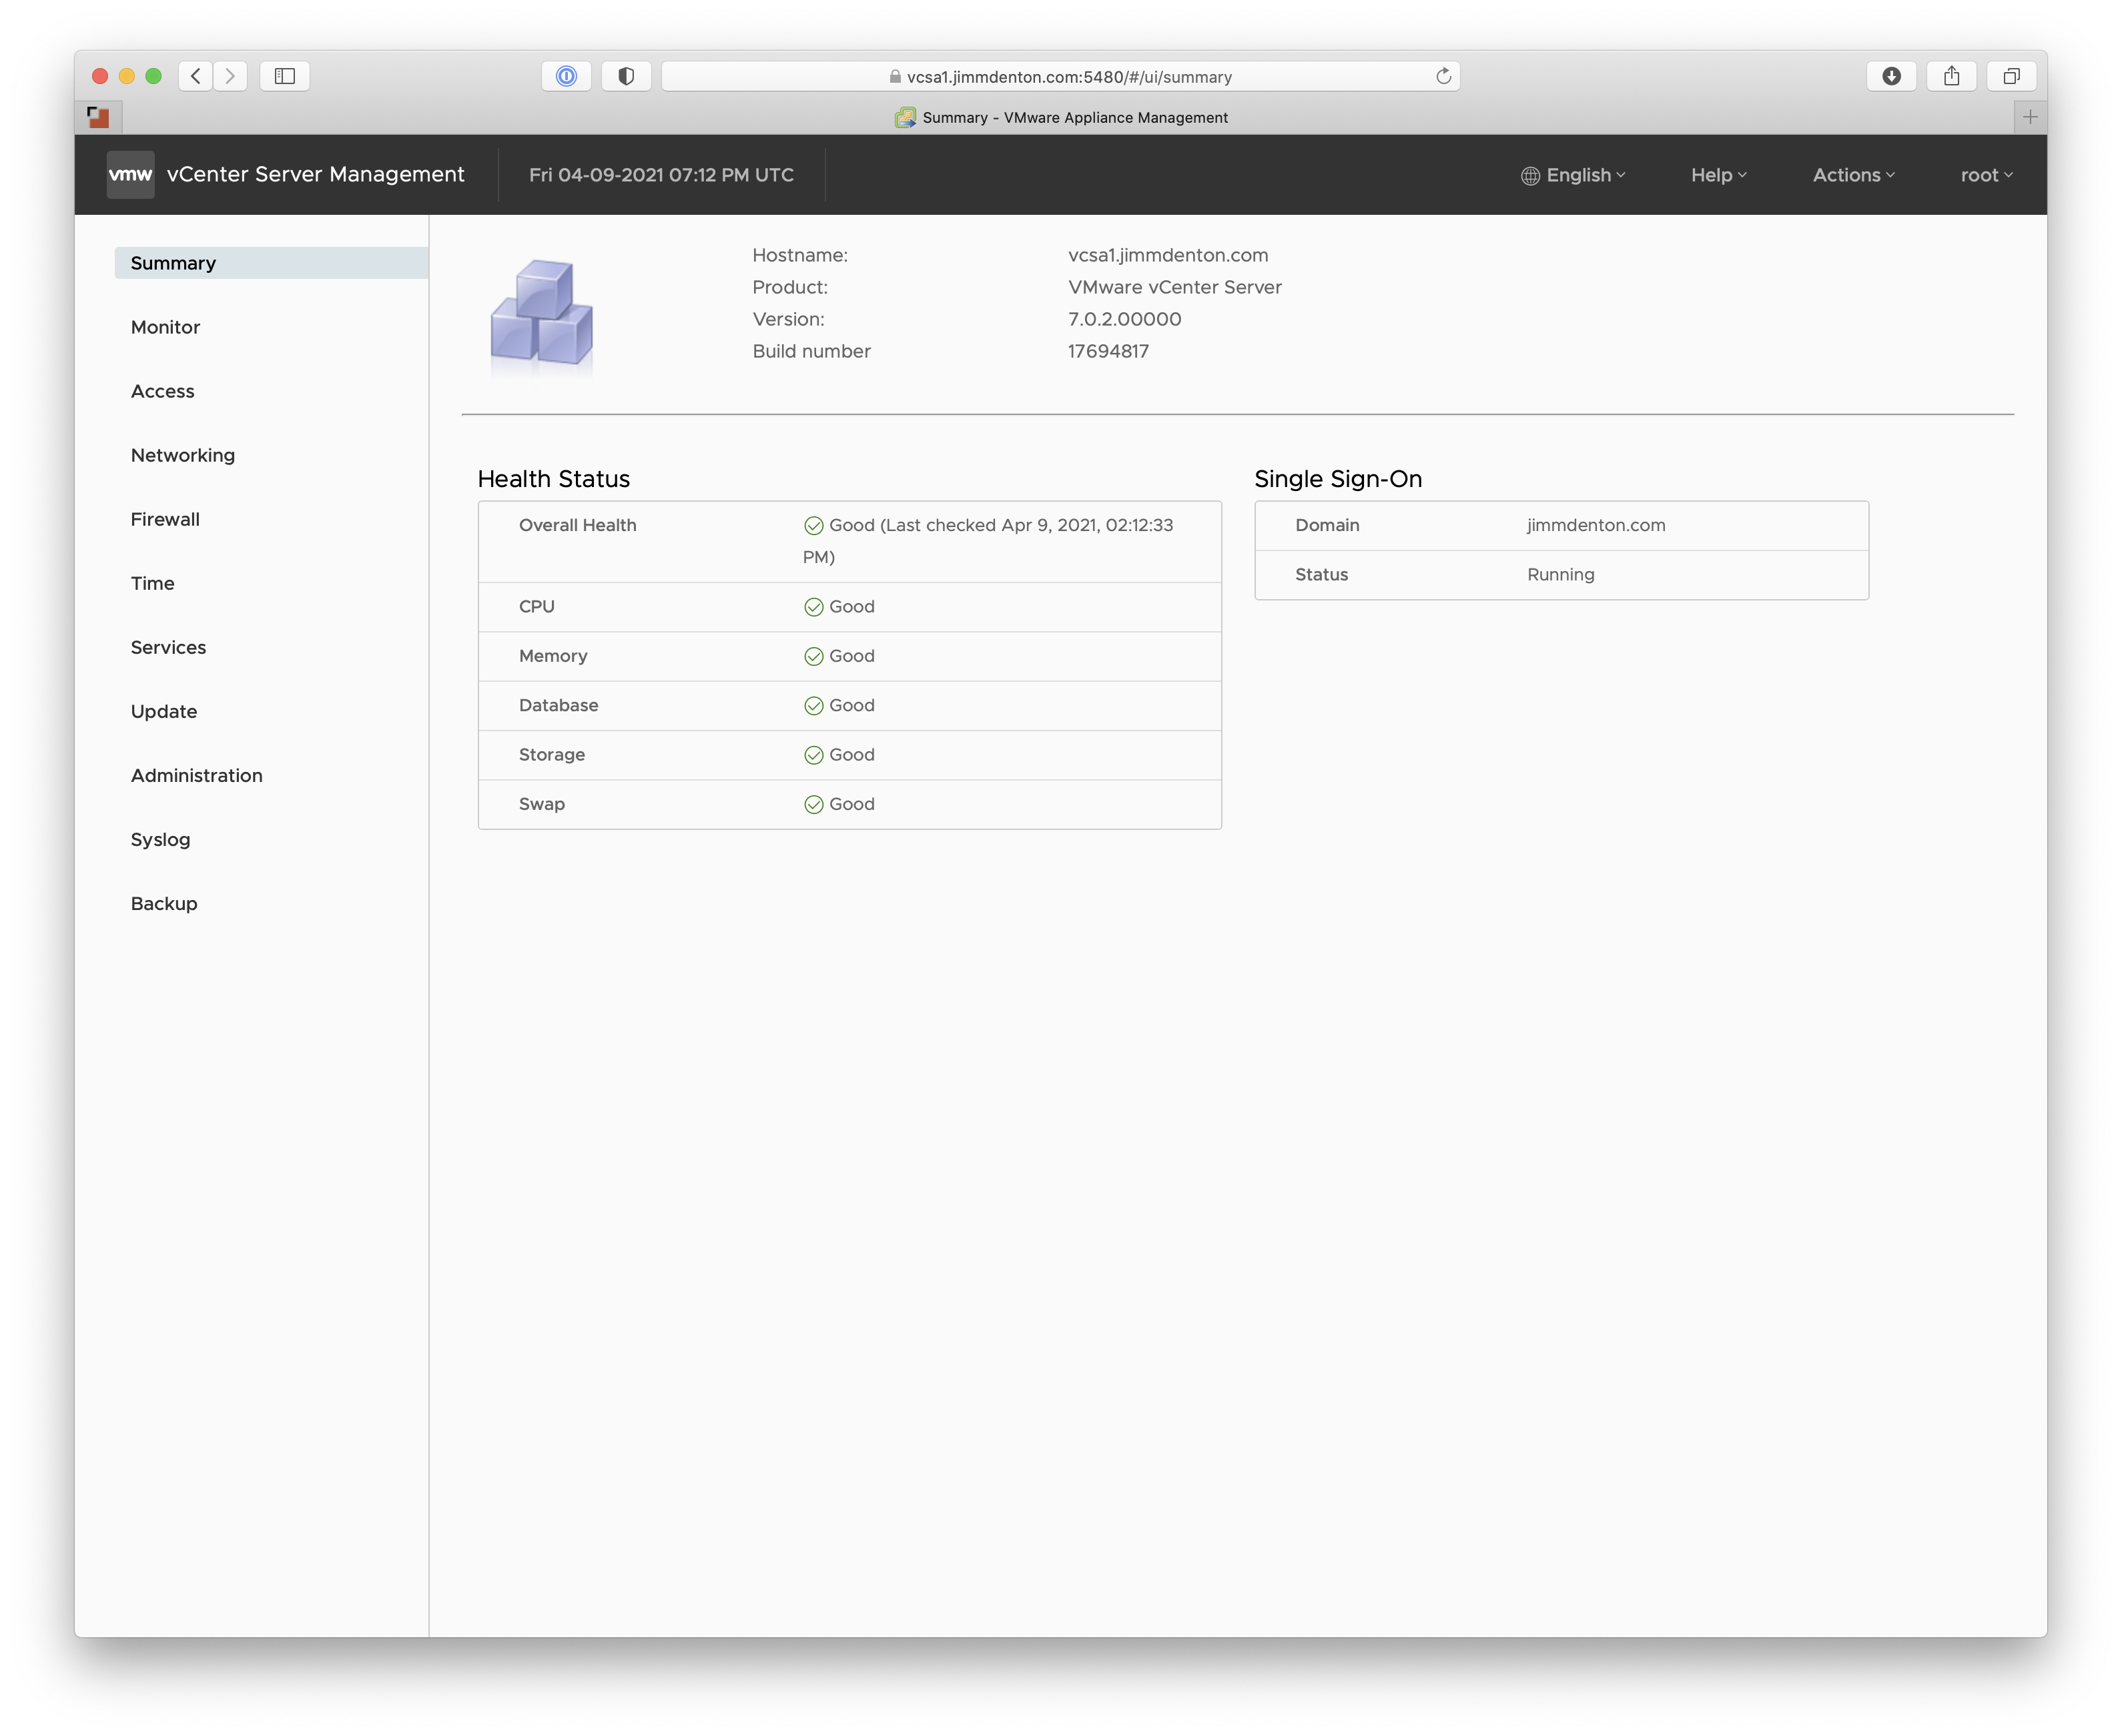
vCenter Client
To open to the vSphere Client dashboard, navigate to https://vcsa1.jimmdenton.com and hit the Launch vSphere Client (HTML5) button.
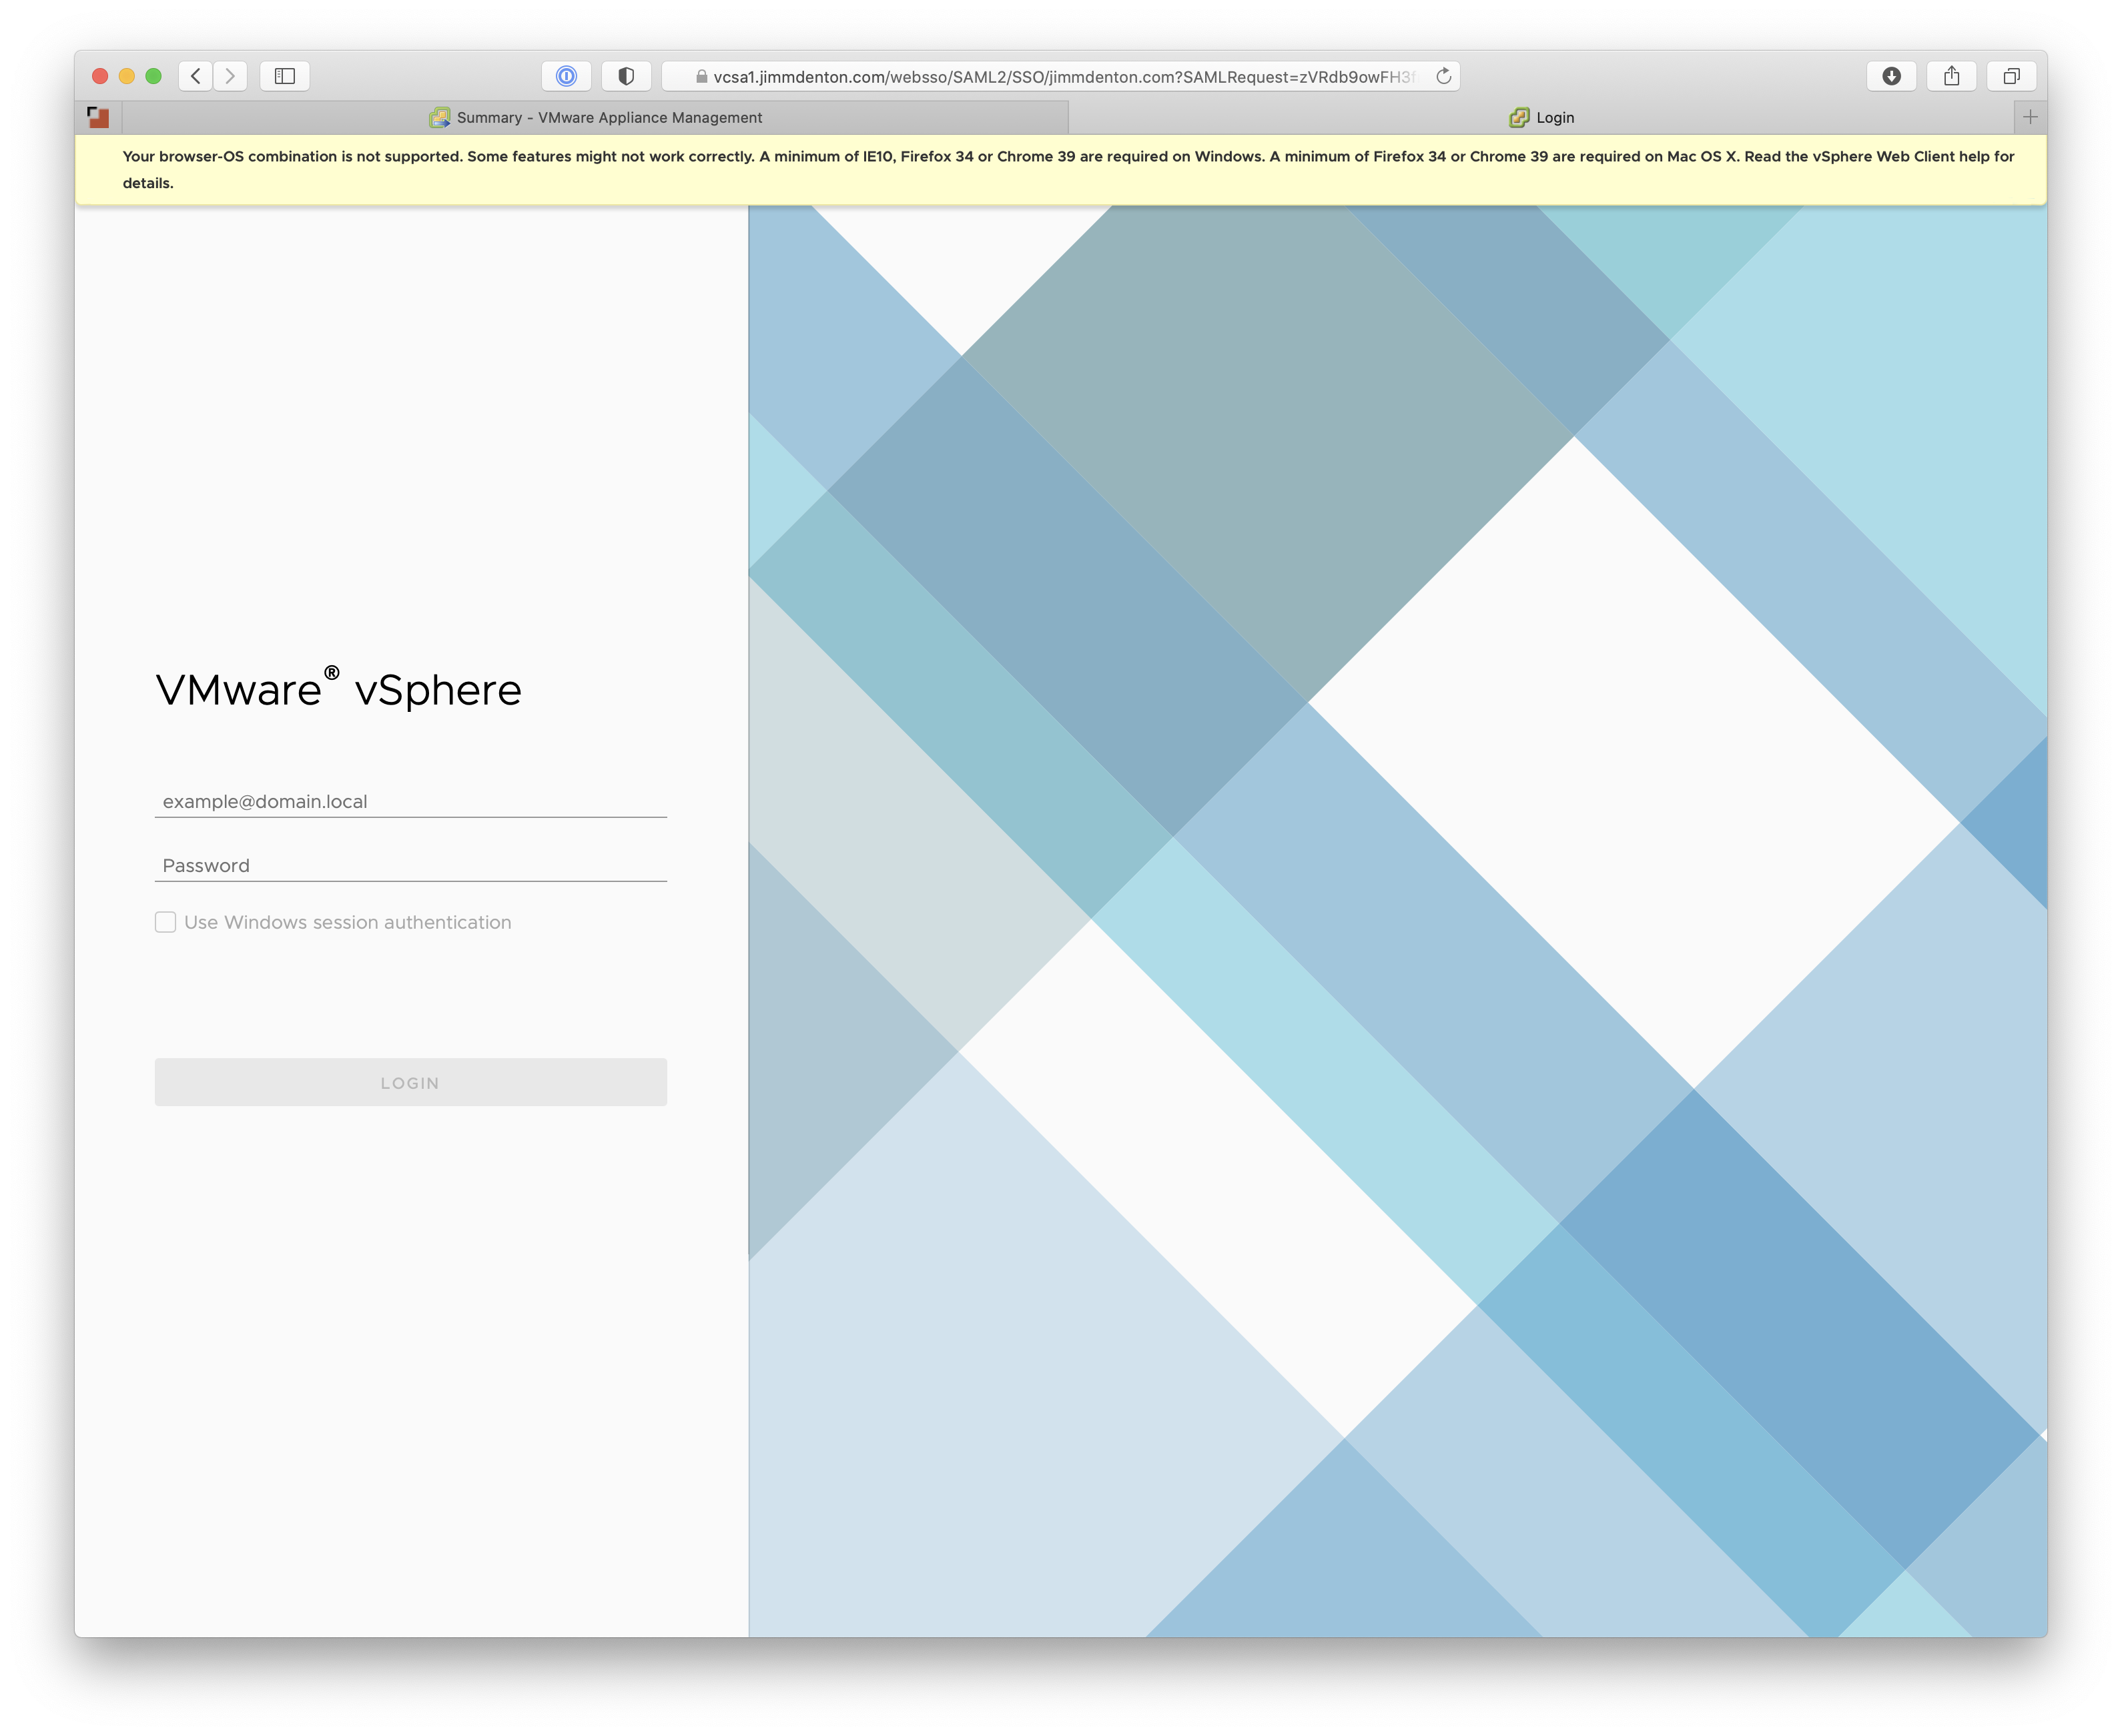
Here, you will login with the credentials set during the SSO creation process:
- username:
administrator@jimmdenton.com - password:
0p3nst@ck$$NSX
Once successfully logged in, you will see the vSphere Client dashboard in all its glory:
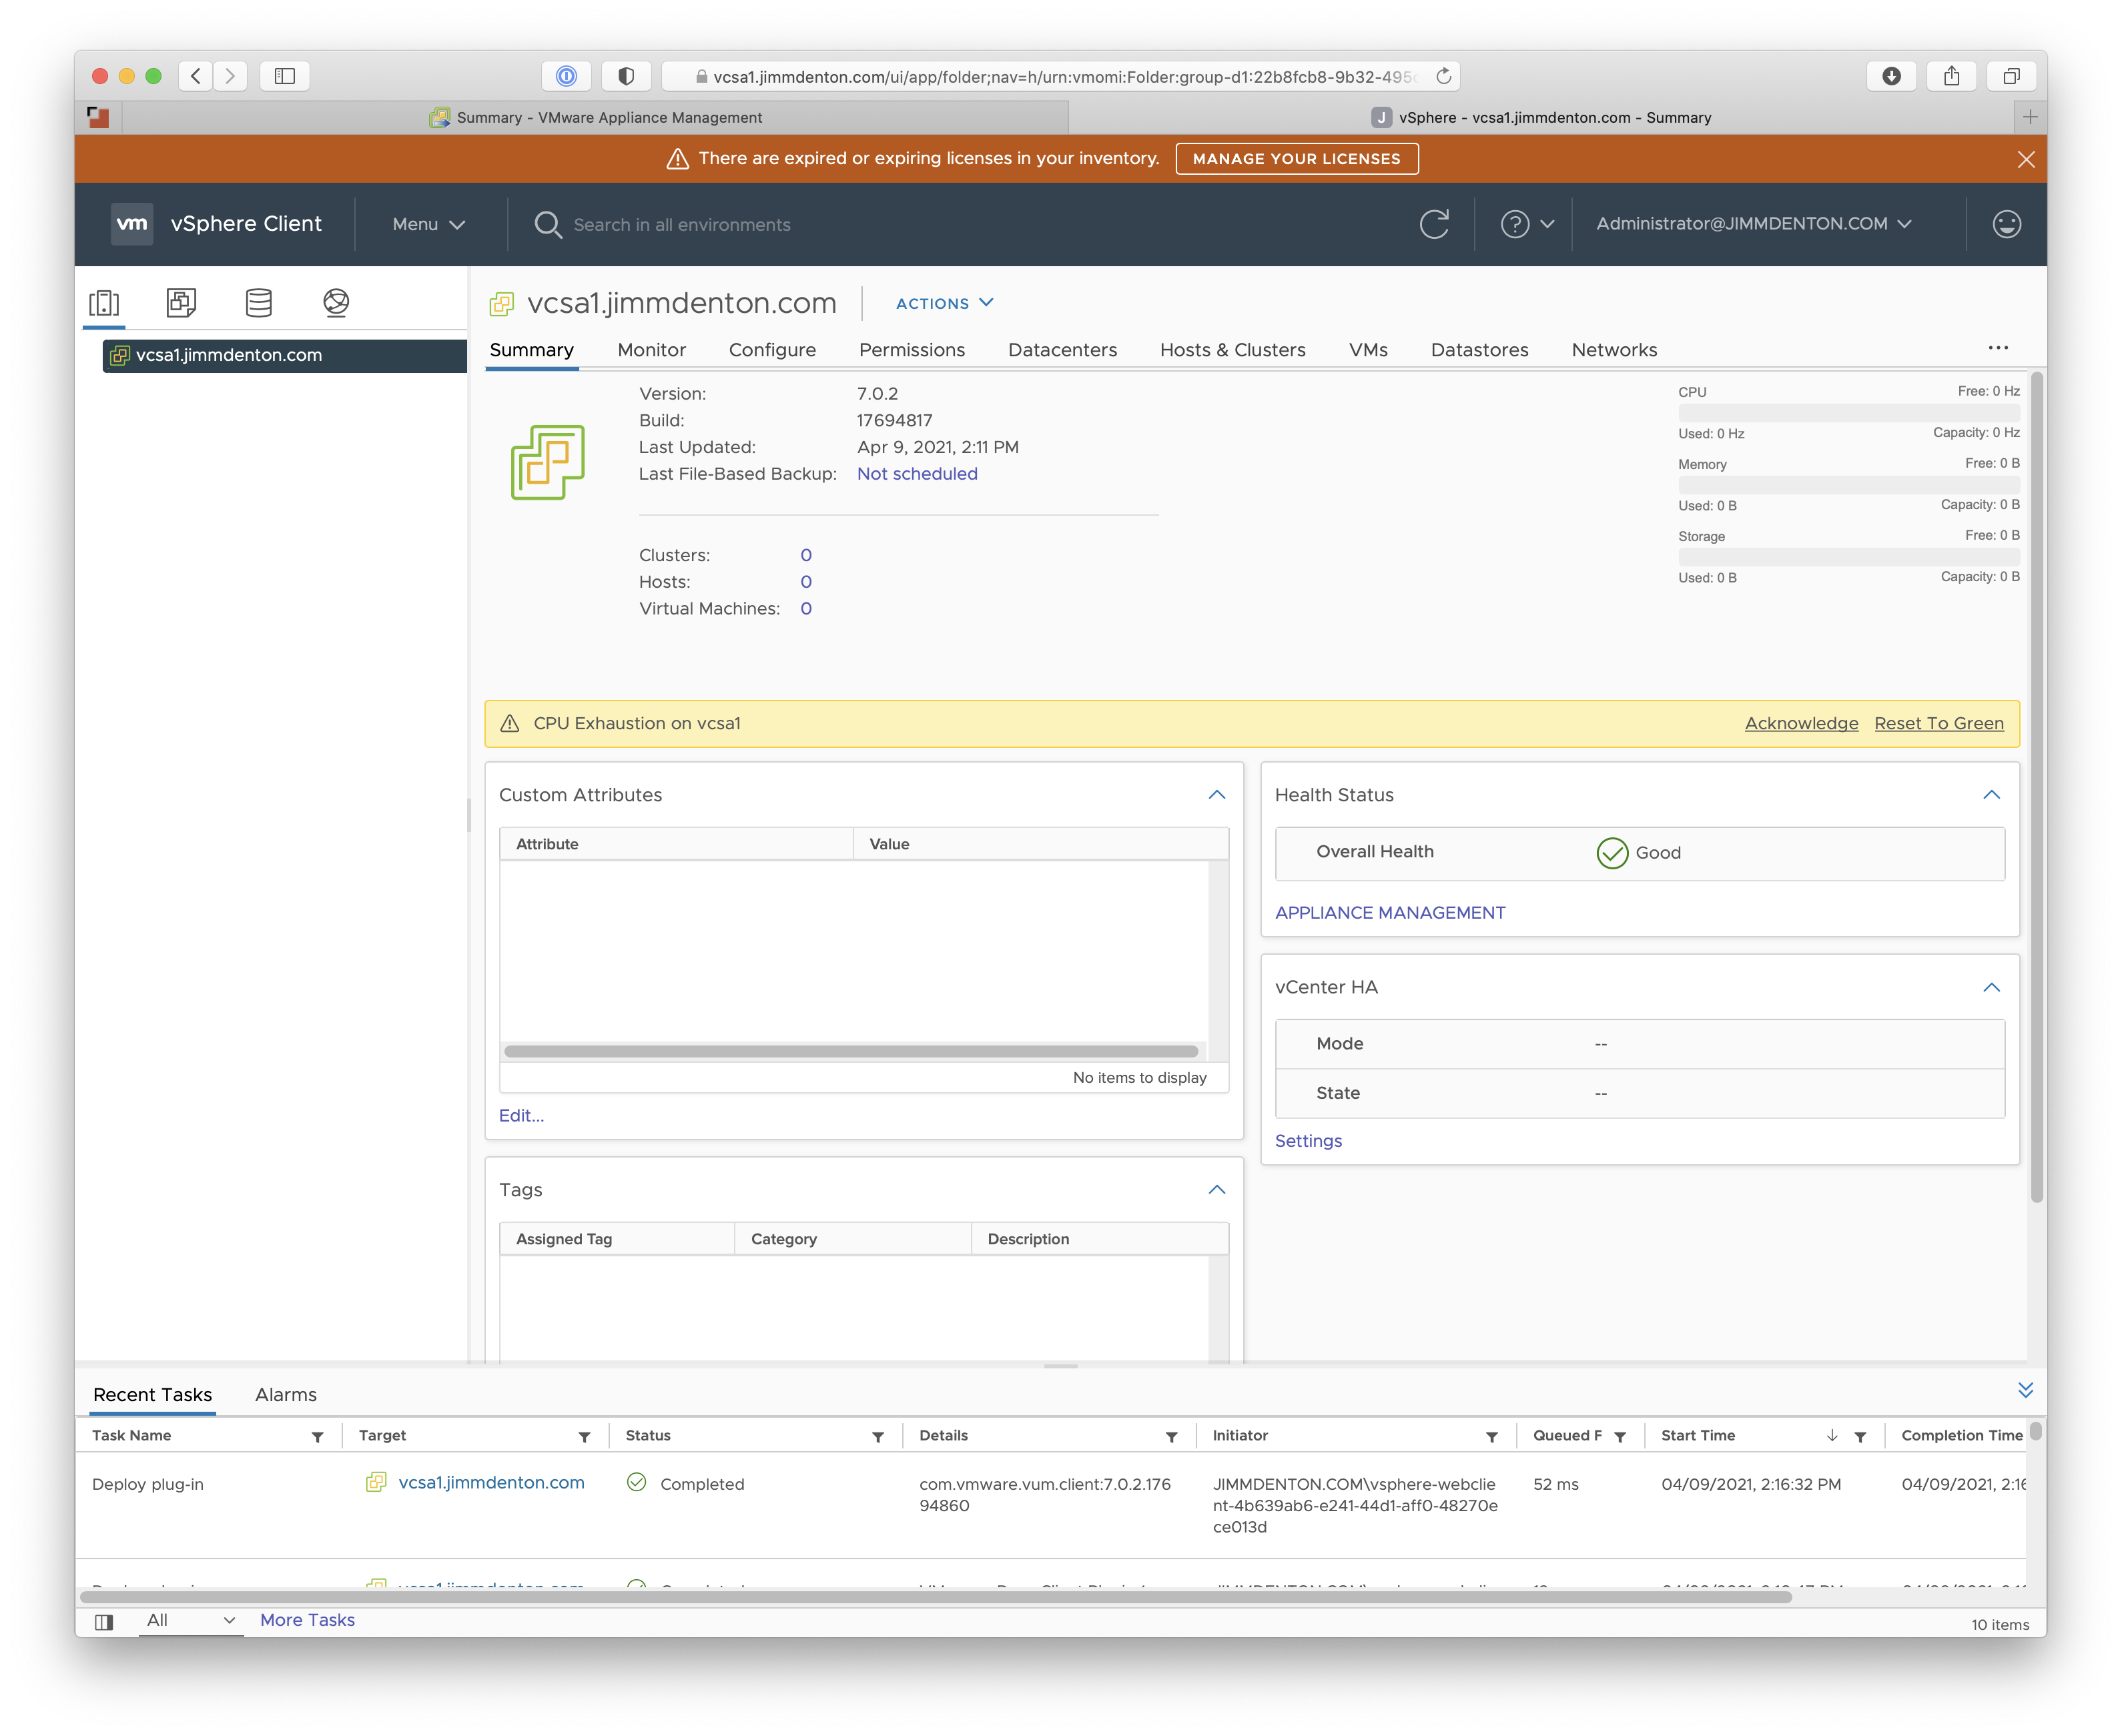
Where you go from here is up to you!
If you have some thoughts or comments on this process, I’d love to hear ‘em. Feel free to reach out on Twitter at @jimmdenton or hit me up on LinkedIn.

James Denton
openstack, networking, and random musings